Sunday, 20 July 2014

International Cake Day (20th July) - Enough Said...

“20 July 2011 kicked off the first celebration of the International Cake Day established in the Kingdom of Love. This sweet summer holiday is dedicated to friendship and peace between people, countries and nations. The motto of the holiday is I CAKE YOU.”


http://www.kingdomoflove.org/kingdom_cake_day_en.html


I love any excuse to bake and this Sunday the 20th is International Cake Day....I took this as a challenge to try some cakes with unexpected twists. Curry and chilli in cake...turns out they are delicious! Tried and tested by my friends and family this weekend, and have my seal of approval. 

Are you brave enough to give these a go?

NOTE: I use 'chia/flax eggs' in my baking as they are cheaper, nutrient dense and provide a vegan option for baking. Don't be scared of using this option. These little seeds are super good for you and is a great way to cut some calories in your baking. 

Chilli Chocolate Cake:

Makes 1 standard sized cake:


Ingredients:

200g dark chocolate, melted (I used half 90% dark Lindt and 70% dark Cadbury)
200g fat-free, Greek yoghurt - Applesauce for vegan (I love Lite Greek by Meadow Fresh or Low fat Greek by Cyclops)
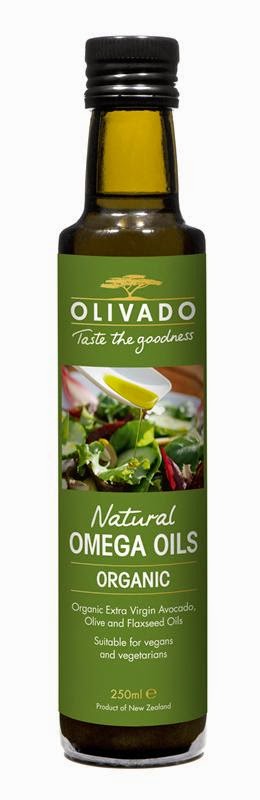
50ml vegetable oil – (I’m loving Olivado Omega Plus Blended Oil at the moment)
150g soft brown sugar (I used a mix of coconut, erythritol and powdered stevia)
100g ground almonds
5ml dried chilli flakes (recipe says 10ml but it was quite hot so I suggest half the amount)
30ml cocoa powder (Blooker Cacao is my preference) 
50g unsweetened desiccated/shredded coconut
4 large eggs - or chia eggs for vegan - I used two whole eggs and two 'chia eggs'.
140g cake flour (I used a blend of wheat and spelt)
10ml baking powder

Method:

1. Preheat the oven to 180ÂșC and grease and line a cake pan with baking paper.
2. Combine the melted chocolate, yogurt, vegetable oil, sugar, ground almonds, chilli flakes, coconut and cocoa powder in a food processor. Blend until smooth.
3. Add the eggs one by one whilst blending. Add the flour and baking powder, blend until well incorporated.
4. Pour the batter into the prepared tin and bake for 20-25 minutes until a skewer inserted comes out clean.


Curry Coconut Banana Cake:

http://jessthomson.wordpress.com/2007/08/22/the-genesis-of-a-coffee-cake/


12 servings.

Toast the coconut in a dry pan over medium heat on stove top or in the oven spread on a tray – toast until lightly golden brown.

For topping:

3 Tbsp (packed) brown/coconut sugar
1/2 cup toasted unsweetened coconut flakes
1/2 teaspoon curry powder
1 teaspoon ground cinnamon

For cake batter:

2 3/4 cup white whole wheat flour
2 teaspoons baking powder
1/2 teaspoon salt
1/2 teaspoon curry powder
1/2 teaspoon ground cinnamon
3/4 cup toasted unsweetened coconut flakes
2 large eggs
1/3 cup sugar (Use Natvia or Erythritol for low sugar option)
1/2 cup (packed) brown sugar (Coconut sugar for low gi)
1 teaspoon vanilla extract
1/2 cup low fat Greek yoghurt/sour cream
3 large/4 medium very ripe bananas, mashed
2/3 cup light coconut milk
1/4 cup oil - coconut/flax/hemp etc...

Method:
1. Preheat the oven to 180C and position the rack in the middle of the oven.
2. Spray oil and flour a 10-inch/25-cm tube pan/Bundt tin and set aside.
3. Mix the topping ingredients together in a small bowl, and set aside.
4. Next, make the batter: Whisk the flour, baking powder, salt, curry, cinnamon and coconut in a mixing bowl, and set aside.
5. In the work bowl of a stand mixer fitted with the paddle attachment, cream the eggs and both sugars together until light, about 3 minutes on medium speed.
6. Add the remaining wet ingredients, and mix until well blended.
7. Add the flour mixture in three separate parts, mixing on low speed between each addition until incorporated.
8. Scrape down the sides of the bowl with a spatula, and mix again.
9. Sprinkle half the topping mixture in the base of the tin. Pour half the batter into the prepared pan, sprinkle the rest of the topping over the batter, then top with remainder of the cake batter and bake for 45 to 55 minutes, until the top is cracked and the cake tests clean with a wooden skewer.
10. Let the cake cool for 10 minutes in the pan, then run a small knife around the edges, and invert the cake first onto a large plate, then right-side up onto a serving platter, reserving as much crumble topping as possible. Serve warm or at room temperature (with coconut milk/cream icing drizzle).


I’m loving right now:

GF | DF | V | REFINED SUGAR FREE ☮
Chia bowls • Raw treats • Seed Cereal

Sweeteners used are dates, 100% pure maple syrup and coconut sugar.

Tuesday, 17 June 2014

International Sushi Day!

I LOVE sushi! But I hate the guilt that comes with consuming the load of carbs and high sodium and sugar content of the sushi you get from the restaurants/food courts etc.

For some advise on choosing the best option when eating sushi out, check this guide out.

I thought I would share my tasty crowd-pleasing 'clean' sushi and even throw in a completely rice free option if you are on a raw/paleo diet. These recipes are flexible to dietary requirements and personal tastes - all fillings are optional and interchangeable.

I took the quinoa brown rice sushi to a party last week and they were a hit with all types! I promise they are delicious and so easy to make.

Happy Sushi Day!

Be brave and give these a go...


Clean:


Quinoa and Brown Rice Sushi:

Makes 4 vegetable rolls and 2 salmon rolls

§  1/2 cup long grain brown rice
§  1/3 cup any colour quinoa
§  2 tablespoons rice vinegar*
§  1 teaspoon sugar/stevia
§  3 nori sheets
§  1 teaspoon wasabi, optional
§  1 small Lebanese cucumber, sliced
§  3/4 medium avocado, sliced
§  1 carrot, peeled and grated
§  1 medium beetroot (120g), peeled and grated or roasted and sliced
§  1 1/2 tablespoons toasted sesame seeds/tamari roasted seeds
§  50g (approx.) raw/smoked salmon (use sushi grade salmon if available)


Directions:

  1. Start by cooking both the quinoa and brown rice.
  2. To cook brown rice, measure out, put into a sieve and rinse.  Transfer into a small saucepan with 2 cups water, place lid on saucepan and bring to the boil.  Lower the heat to a simmer and cook for 30-40 minutes (check packet for cooking time as it varies greatly with brown rice from 25-50 minutes).
  3. To cook quinoa, measure out and place in a sieve and rinse well.  Transfer into a small saucepan with 2/3 cup water, place lid on saucepan and bring to the boil.  Lower the heat to a simmer and cook for 15-18 minutes.  When cooked, fluff with a fork.
  4. Mix together hot rice, hot quinoa, rice vinegar and sugar.  Set aside to cool.
  5. While you are waiting for the rice mixture to cool, prepare the fillings.
  6. Place a sushi bamboo mat down on your bench with the slats running horizontally.  Have a small bowl of water close by.
  7. Place nori sheet on sushi mat with the shiny side down. Option: using the back of a teaspoon, spread a small amount of wasabi along the front edge of the nori sheet.
  8. Measure out approx. 1 cup of the quinoa and rice mix and using wet hands, spread it evenly over the front ¾ of the nori sheet, leaving at least a 3cm-wide border along the edge furthest from you.
  9. For the vegetable sushi:  Place cucumber along the front edge on top of the quinoa and rice, then follow with avocado, carrot, beetroot and lastly sprinkle with seeds
  10. Roll nori sheet up.  Use your thumbs and forefingers to pick up the edge of the mat closest to you. Use your other fingers to hold the filling while rolling the mat over to enclose the nori sheet around the filling. Gently pull the mat as you go to create a firm roll.
  11. When it is half rolled up, dip one of your hands in water and wet the end of the nori sheet. Continue rolling until all the quinoa is covered with the nori and you should have a neat roll.
  12. Repeat with vegetable filling, then with salmon filling.
  13. When complete, you will have 2 very long vegie rolls and 1 long salmon roll.  Cut the rolls in half (to make 4 vegie rolls and 2 salmon rolls) or in bite sized pieces.
  14. Serve with soy dipping sauce. 

Per Serve (vegetable roll):  674kJ or 160 calories; P 5g Fat 6.8g SFat 1.3g CHO 25g Fibre 4g
Per Serve (salmon roll):  742kJ or 177 calories; P 9g Fat 8.5g SFat 1.7g CHO 22g Fibre 3g
*Rice vinegar and Sushi bamboo mats are available from the supermarket in the Asian section or at any specialty Asian supermarket (e.g. Kosco).


Paleo Rolls:


Makes 8 maki rolls, feeds 4

For  the cauliflower sushi rice
  •  650g fresh cauliflower
  • 2 tbs (about) white vinegar
  • 1/2 tbs stevia or honey (optional)
  • 1/4 tbs salt


For the filling
  • 200g fresh sashimi-grade salmon or other fish or cooked chicken, sliced thinly (Tofu for vegetarian)
  • Omelette (2 eggs + Tbsp soy/tamari)
  • 1 avocado, sliced
  • Cabbage
  • 1 Carrot, julienned
  • Radishes, sliced thinly
  • 1 cucumber, julienned
  • 2 spring onions, julienned

·         8 sheets of nori

Directions:

  1. Rice your cauliflower in a food processor by pulsing several times until it breaks down into small particles that look like rice. Alternatively, grate carefully and avoid cauliflower missiles.
  2. Sautee your cauliflower on gentle heat with the vinegar, sweetener (if using), and salt. Adjust to your liking. Set aside to cool.
  3. Lay your nori sheet over a bamboo mat with the shiny side facing down (because it’s prettier that way). If you don’t have a bamboo mat, a moistened tea towel works fine.
  4. Arrange about 3 tablespoons of cauliflower rice over the nori, leaving a gap on all sides. Have a bowl of water handy to get the rice off your fingers.
  5. Arrange a line of your filling over the 'rice'. Salmon first, then cucumber, then avocado and any other of the options you may like. Do not overfill.
  6. Start to roll your sushi by turning the bamboo mat or tea towel in on itself once, push down and outwards all along the length of the roll. Pulling the mat or towel straight across the roll like along the wheels of a tank, repeat the securing. Then rolling. Securing and rolling. Secure and roll.
  7. Slice with a sharp knife and serve with Tahini sauce


Tahini sauce:
  • 2 tablespoons tahini
  • 1 tablespoon miso
  • 2 tablespoons peeled ginger root
  • 1 tablespoon tamari
  • 1 tablespoon agave nectar/honey
  • 1/8 cup water (more or less)


Things I'm loving this month:

  • Henry Langdon Cocoa and Chai Spice is sugar free and delicious! I have it with some vanilla extract and a slosh of trim milk…so warming on these cold Winter days. Buy from Traiteur in Merivale Christchurch. 

Sunday, 25 May 2014

The Low-down On Sweeteners - Baking With Less Sugar


Newest food mash-up:

I saw these recently online and had to put my spin on them! They are a great healthier alternative to the muffin/scone from the cafe you by for the on-the-go breakfast or snack. Bake these on a Sunday and have healthy snack/light breakfast option for the whole week.

The scuffin is a frankenpastry — part scone, part muffin and, like a doughnut, filled with jam —but despite its complex genetics, it is very easy to make. It is even fairly healthy, using whole grain/gluten free flours and flaxseeds, and keeping the ‘fat’ minimal. The spices can be varied (swap in nutmeg, ginger or allspice for the cinnamon or cardamom), and so can the jams.


TOTAL TIME
1 hour


INGREDIENTS
  • 1/4 cup coconut oil (solid)
  • 1 cup spelt/white flour
  • ¼ cup quick oats
  • ¼ cup buckwheat flour
  • ¼ cup almond flour
  • 1/4 flaxseed meal or wheat germ
  • 3 tablespoons light brown or raw sugar, plus extra for sprinkling (I used 1 Tblsp of brown sugar, 1 Tblsp of granulated stevia and 1 Tblsp of Erythritol*)
  • 1 1/2 teaspoons baking powder
  • 1 teaspoon cinnamon
  • 1 teaspoon ground cardamom
  • 1/2 teaspoon sea salt
  • 1 egg
  • 1/3 cup milk
  • 1/3 cup Greek yoghurt
  • 2-4 Tablespoons of fruit jam, conserves, preserves or fruit butter (I alternated between; lemon curd, rhubarb jam and apricot preserve)
PREPARATION
1. Heat oven to 180 degrees Celsius. Using an oil spray, coat the cups of a standard-size 6-cup muffin tin (12 small/mini).

2. In a mixing bowl, combine dry ingredients. Meanwhile, melt 4 tablespoons coconut oil, add to dry ingredients and mix with a fork until just combined.

3. In another bowl, whisk together egg, milk and cream. Add to dry ingredients and mix to combine (the dough will be quite sticky).

4. Reserving about a quarter of the dough for topping, scoop 2 tablespoons dough into each cup. Using the back of a spoon, press dough gently down into the cups. The dough will move up the sides, and there should be a shallow well in each dough cup. Don’t worry if the dough doesn’t come all the way up to the top; there should be about 1/2 inch of space between the top of the dough and the rim of the cup.

5. Spoon about 1 teaspoon jam into each well. Using your fingers, pinch remaining dough into small clumps and scatter evenly over the jam in each cup, making a bumpy topping or just scoop a tablespoon or so or the mix on top for a smoother topped scruffin. Sprinkle raw sugar over the tops.

6. Bake 20 to 25 minutes, or until browned. Let cool in the pan on a rack.

Makes: 6 (12 small) scuffins


HFG guide to sweeteners:


By Tracy Morris

With so many different sweeteners available, it can be difficult to know which one is best for your needs.

Non-nutritive sweeteners are intensely sweet, meaning only a very small amount is needed – so they are virtually kilojoule-free and have no impact on blood sugar levels. With the exception of stevia, most non-nutritive sweeteners are chemically produced.

Aspartame (eg. Equal, NutraSweet)

What is it? An artificial sweetener made by joining two amino acids – aspartic acid and phenylalanine.
Nutritional properties: Provides about the same amount of energy as table sugar, but because it is 160-220 times sweeter than sugar, only a tiny amount is needed, making the energy negligible.
Best use: Aspartame loses its sweetness at high temperatures so it’s not suitable for cooking. It is commonly used in cold food products such as diet soft drinks, cordial and yoghurt.
Take note: People with Phenylketonuria (PKU) – an inherited disorder that increases the levels of amino acid phenylalanine (a building block of proteins in the blood ) – are advised not to consume aspartame as it contains phenylalanine.

Acesulphame potassium or Ace-K (eg. Equal Spoon for Spoon, Sweet One®, Sunnett)

What is it? A synthetically produced potassium salt.
Nutritional properties: Ace-K is 200 times sweeter than sugar and does not provide any kilojoules as it is not broken down by the body.
Best use: Baking, because it is stable at high temperatures.
Take note: In high concentrations it has a slightly bitter aftertaste so it is often blended with other sweeteners to produce a more sugar-like taste.

Sugar alcohols or polyols (eg. sorbitol, xylitol, erythritol)*

What is it? These occur naturally in certain fruits or can be produced artificially from glucose.
Nutritional properties: Provides half the kilojoules of table sugar  but only a small amount is absorbed into the bloodstream.
Best use: Often used to replace sugar in chewing gum, polyols are not broken down by mouth bacteria so they don’t promote tooth decay.
Take note: If eaten in large quantities, they can have a laxative effect and cause diarrhoea, bloating and gas.

Stevia or steviol glycosides (eg. Equal Stevia, NuNaturals Nu Stevia™, Natvia)

What is it? A natural, non-nutritive sweetener extracted from the leaves of the stevia herb.
Nutritional properties: Stevia is 250-300 times sweeter than table sugar, with no impact on blood sugar levels. It has 11kJ per gram.
Best use: People who prefer a natural sweetener over a synthetic one but don’t want the kilojoules.
Take note: Some stevia extracts have a distinct aftertaste similar to liquorice.

Saccharin (eg. Sweet’N Low®, Necta Sweets, Sweet Twin)

What is it? A synthetically produced sweetener made by combining a number of chemicals.
Nutritional properties: Saccharin is 200-700 times sweeter than table sugar and provides no energy.
Best use: Enhances the strength of other sweeteners.
Take note: Not recommended for pregnant women or children under two years.

Sucralose (eg. Splenda®, Sugar Free Natura)

What is it? Sugar that is chemically processed to replace hydrogen and oxygen molecules with chlorine molecules.
Nutritional properties: Six hundred times sweeter than table sugar, with most of it passing through the body unchanged, providing no energy.
Best use: Since it is the most heat-stable non-nutritive sweetener, sucralose can easily be used to replace sugar (cup for cup) in cooking and baking.
Take note: Sucralose tastes very similar to sugar and has no bitter aftertaste, which is common with other non-nutritive sweeteners.


Top non-nutritive sweetener picks
  • Best for baking: Sucralose or stevia
  • Most natural: Stevia
  • Best for your teeth: Sugar alcohols


Interesting article I found this week: Do you know what's really 'in' your drink?
My newest app I hate to love (my bladder hates me): Water Your Body...
 50 Apps Tip Top Condition roundup: Water Your Body

My favourite inspirational quote lately: MIND POWER!!!!